Overview
In this workshop, we were introduced to the process of animation and film production and focused on the film language. After that, we made a short storyboard based on the script provided.
Film Language
In a good film, the audience understands the story that the filmmaker is trying to show them, and feels what the filmmaker means them to feel.
To be a successful filmmaker, you need to use different techniques to make sure this happens.,which means You need to know about film language.
1. Composition
Composition means how you arrange things in the shot. Your film will look a lot better if you compose the shots carefully. Pay attention to where things are in the shot, what’s happening at the edges of the frame, and what’s going on in the background.
- When you film a closeup of somebody, try to put the eyes about a third of the way down the picture.
- If they are too low or too high it’ll look wrong.
- Pay attention to the edges of the frame: try not to cut off people’s arms or legs at the joints.
- Put more space in the direction people are looking or moving. This is called looking space or nose room.
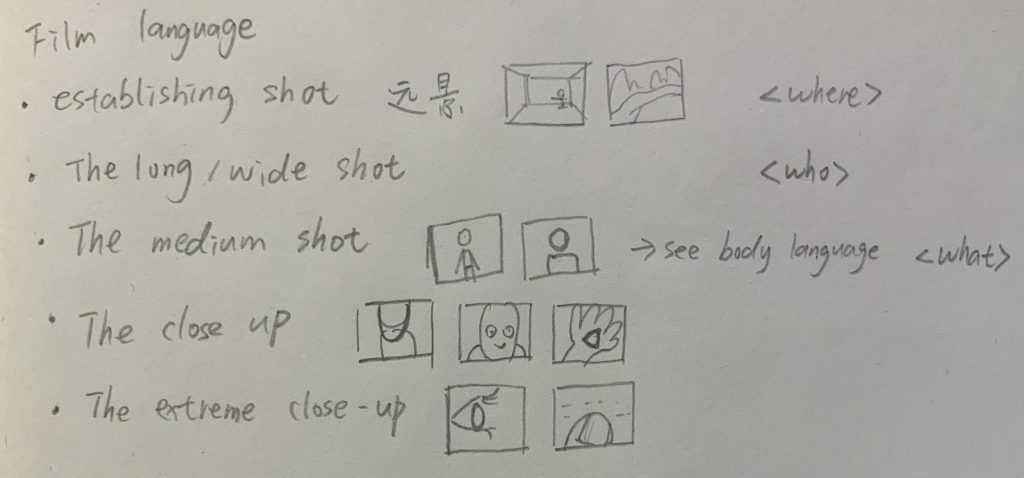
2. Shot Size
Shot size means how much of the scene is included in the picture, and whether it mainly shows the setting, people in the setting, or details of faces and things.
- Extreme long shots mainly show the setting: if they include people, they’ll be very small. You can use these kinds of shots as establishing shots at the beginning of a film or a sequence to show where the scene is set. Showing people in an extreme long shot can make them look lost, lonely or insignificant.
- Long shots/wide shots show people from head to toe. These are good for showing people together, Introducing people, and showing action.
- Mid shots (or medium shots) show people from their hips to heads. These shots are easier to see body language.
- Closeups let us see expressions and emotions. A medium closeup shows the head and shoulders. It’s fairly loose, so the subject can move a bit. This is a good shot for presentations to the camera.
- Big closeup – which just shows the main features of somebody’s face – to show a strong emotion like sadness, or to make somebody look scarred.
- Extreme closeups just show part of somebody’s face like the eyes or the mouth. You can also use closeups of things, to show patterns and details.
3. Camera Angle
- High angle: The camera will be pointed face down towards the character to show their lack of importance, how powerless they are or vulnerable they are compared to other characters.
- Low angle: Show how important, powerful and dominant they are.
- Canted angle: This angle is deliberately slanted to the side, which is used to show tension, disorientation and uneasiness. This technique is used to create a dramatic effect.
- Bird’s eye view: This view is sometimes used as an establishing shot to show where the character is or is traveling to.
- Worm eye view: This technique is usually used to make a character seem taller than they really are. This angle also shares an unexpected perspective-like entering another world
- Point of view-POV: This angle is from the perspective of a person’s point of view. This camera angle would be filmed from a particular person’s eye level and shows the surroundings or actions from their perspective.
4. Camera Movement
- Pan(turns sideways)
- Tilt(up and down)
- Crane shot(move the camera vertically)
- Tracking shot: You can track in (move forwards) to move through a space, to build intensity in a closeup, to follow a character, or to show what a they’re seeing (a point of view shot). A track out (backwards) can reveal more of a scene, or a character can follow the moving camera. This will take practice, as inexperienced actors or presenters tend to walk too fast.
Tips: When slowly into the mood, the camera slowly zoomed in and out; You can use jump cuts when the mood is interrupted or when the mood swings are very high.
5. Continuity
The continuity system will help you film sequences that make sense. It includes framing, camera position, shot size, editing and sound.
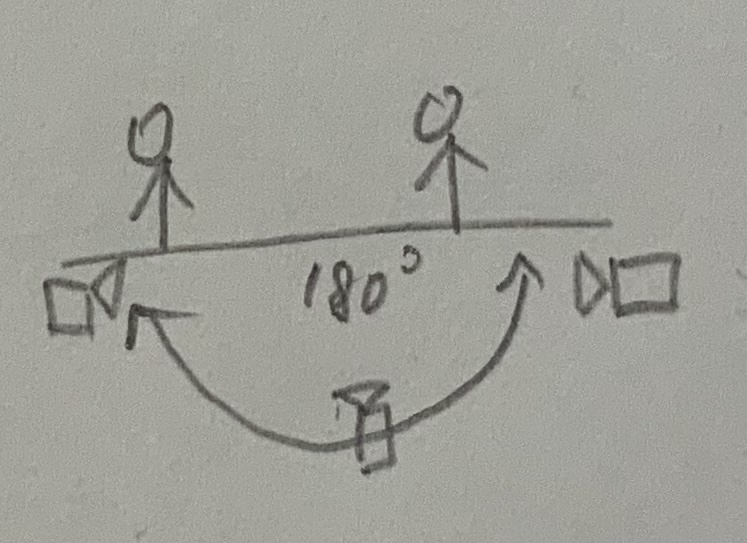
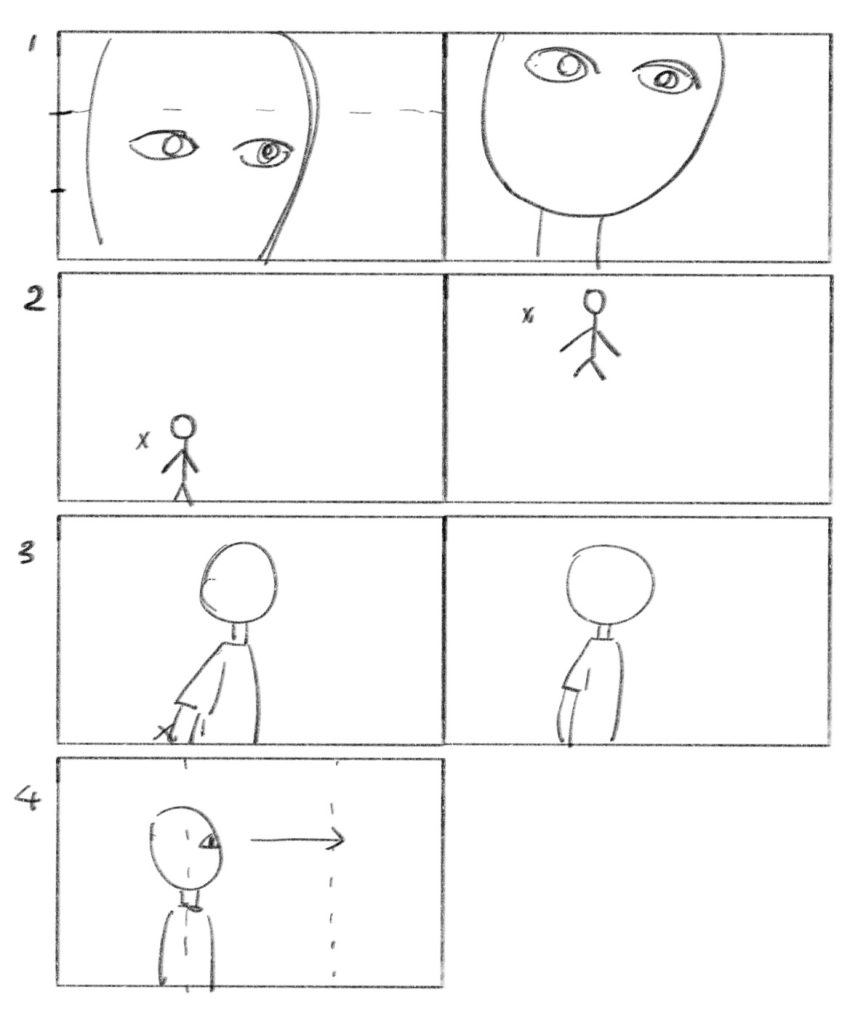
The 180 degree rule
When you film a scene as separate shots, you need to be careful about where you put the camera. It’s important that all the shots seem to be part of the same space. If you cross the line then the shots may not fit together. Your two characters will look as if they’re facing the same way (3 and 4 above), rather than facing each other.
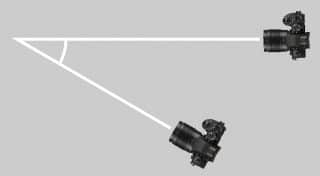
The 30 degree rule
To avoid distracting jump cuts, the camera position should change by at least 30 degrees between shots.
If you break the rule – as in the shots above – the edit may be obvious. To avoid this, change the position as well as the shot size. These shots work together because the angle between them is more than 30 degrees.
And there’s a document showing some elements of film language which I think is quite useful. Here is the link: URL
Storyboard Exercise
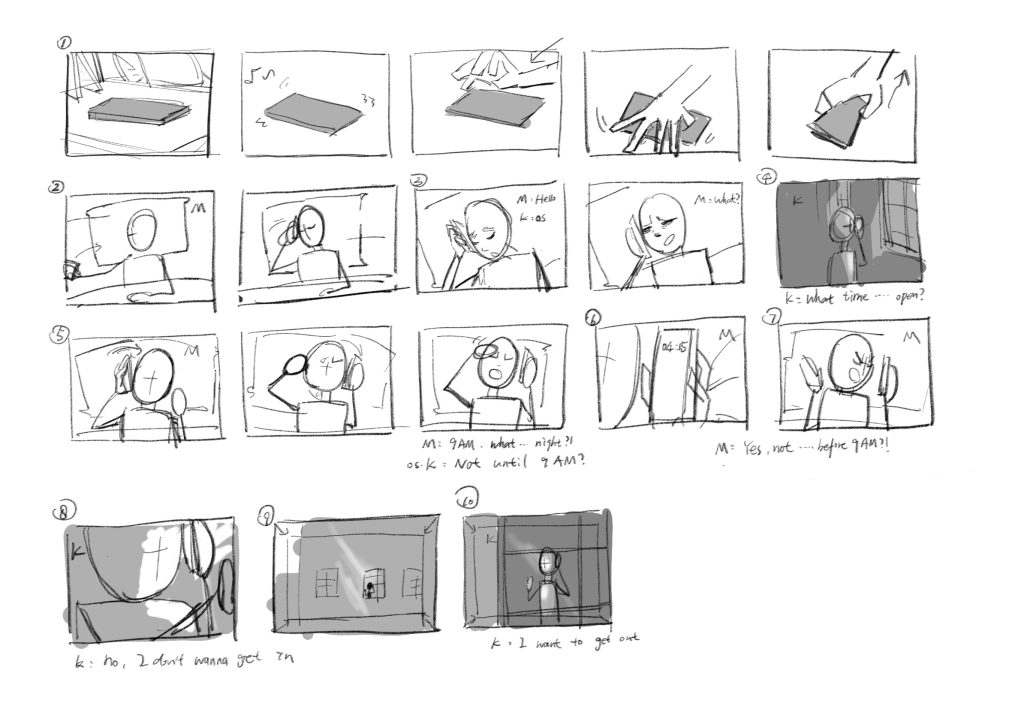
In this exercise, we made a storyboard based on the script provided. Since the story is very short, I used a close-up shot at the beginning rather than a long shot to explain the environment of the story, which I thought would be more dramatic. Out of my understanding, I think this story can be interpreted into a version with a little horror element, so I adopted a different way of narration at the end.
Research on Tekkon Kinkreet
Tekkon Kinkreet makes excellent use of lens language, from which we can see the director’s unique understanding of the use of real film lens techniques in animation. Shaky framing, exaggerated and unrealistic perspective processing, the characters in the golden dividing line near the shot highlighting the characteristics of Matsumoto Ocean is the best explanation.
At the beginning of the animation, a bird’s eye view shot is used to show the environment of the story, which attracts the audience at once. It also echoes the idea that the main characters “can fly” later.
When Kuro found the gang in a high place after stealing the wallet in the audience of the boxing match, the camera tried to capture the gang leader in the instability, which made the audience’s eyes seem to move along with Hei’s eyes, filling the picture with the sense of scene and reality.
Another example is the scene where the shaven developer sits behind his desk and talks, and the figure is not in the middle, but on the side of the frame, which is common in photography and film. This treatment can make the image imbalanced, thus avoiding the dull, and also enhance the realism when used in animation.